Audio Modding Pipeline
AC EVO Audio Modding Pipeline — the complete workflow for creating custom car audio packages using FMOD Studio.
Changelog
- June 3, 2026: V1 initial release
Prerequisites
- FMOD Studio v2.03.13 — Download page
- FMOD knowledge
FMOD Script Installation
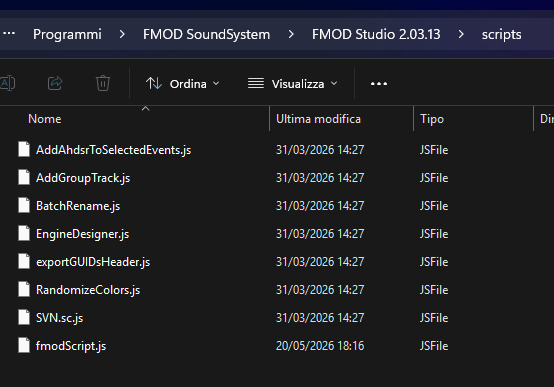
Find the fmodScript.js file in the acevo_content\tools\scripts folder. Copy this file into your FMOD scripts folder (typically C:\Program Files\FMOD SoundSystem\FMOD Studio 2.03.13\scripts). You will need it later inside FMOD Studio.
Prepare FMOD Mod Project
Open the FMOD modding project and the main workspace should be shown (CTRL + 1). You will see all the events you can work on and then assign them to the car in the editor.
The workflow is the following:
- Fork the events with new ones by script
- Set a new master bank by script
- Delete the old master bank (and the default associated events)
- Make your work on the sounds (not part of this pipeline document)
- Build the banks
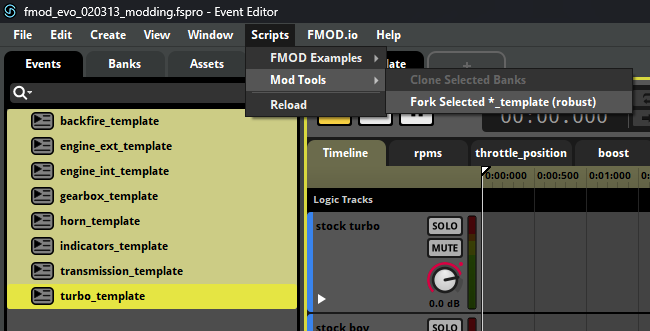
Step 1: Fork Template Events
As you can see, there is a template suffix for each event. The default events SHALL NOT BE USED — it will generate a conflict with other cars.
- Select all events with the
templatesuffix (as shown in the picture above). - Open the top menu Scripts → Mod Tools → Fork Selected *_template.
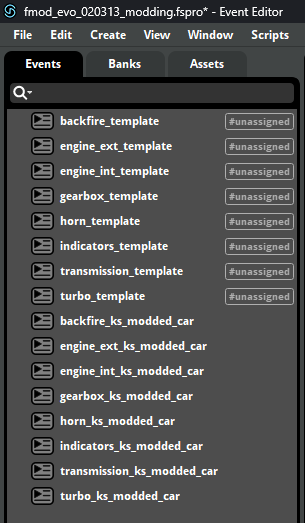
- The script will generate an exact copy of the selected events with a new suffix.
- You can change the suffix by editing the script with a text editor.
Best practice: set the event suffix equal to the name of the corresponding modded car folder.
The first script also unassigns the default events from the original master bank, keeping the project lighter and cleaner.
Step 2: Clone the Master Bank
The next step is to clone the master_bank. Select the Banks tab, select master_bank_template, and then run the Scripts → Clone Selected Banks script as shown below.
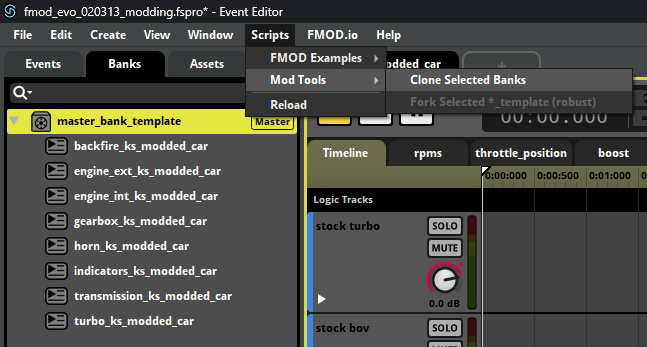
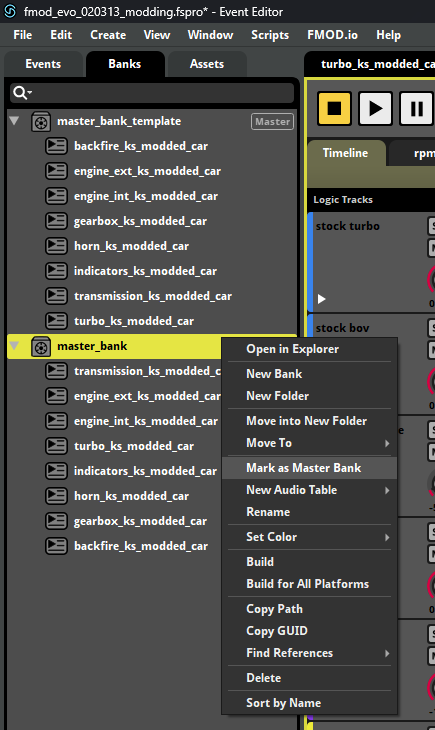
The result is a perfect copy of the original master_bank_template.
Step 3: Mark the New Master Bank
- Right-click on the new bank and select Mark as Master Bank.
- Confirm that a new Master label appears next to it.
- You can now safely remove the original
master_bank_template.
Once done, the project is ready and you can start working on your own sound package.
Build Sound Banks
Once you are happy with your work, it is time to build the banks. Press F7 or use the Build… command in the main menu as shown in the picture.
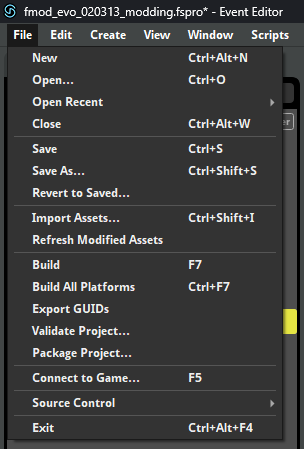
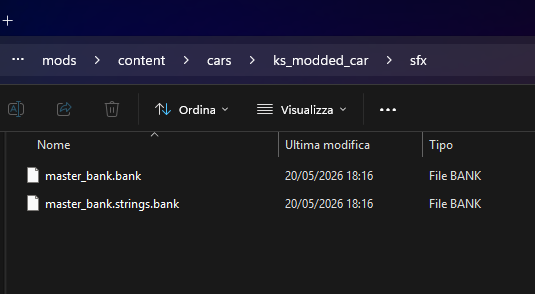
This will build two banks:
| File | Description |
|---|---|
master_bank.bank | Main audio data package |
master_bank.strings.bank | String index data package |
Both files shall be placed inside the sfx folder in your modded car folder.
DANGER
DO NOT touch the Mixer page in FMOD (CTRL + 2)! Modifying the Mixer will mess up the entire game audio!
Use the events volume instead.
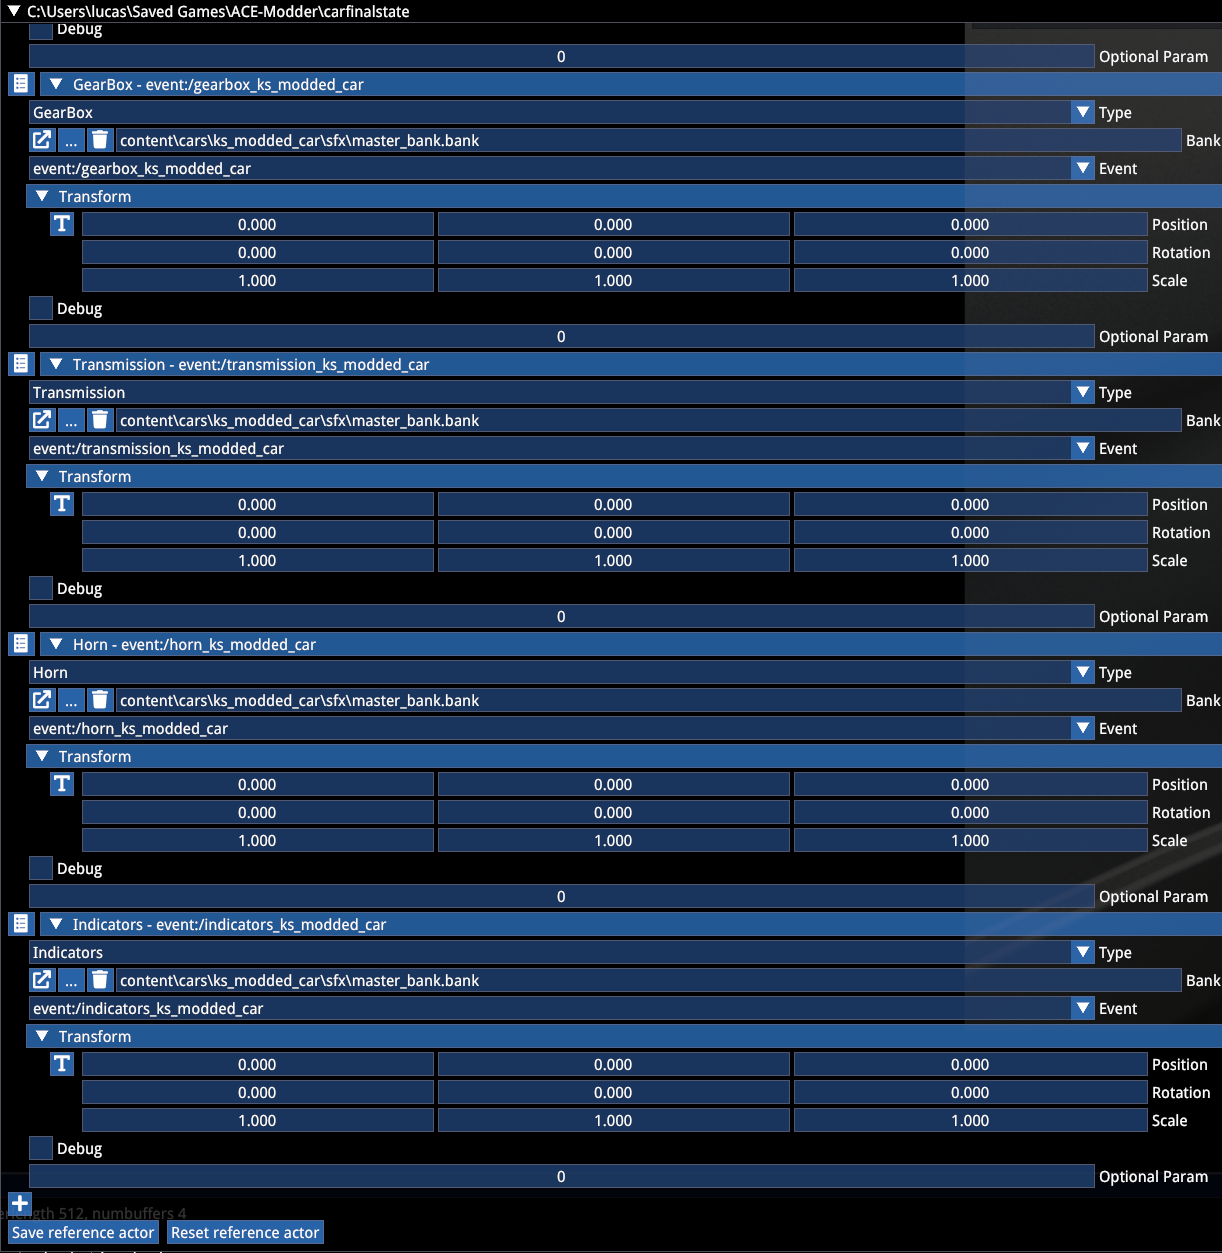
Assign Sound Events
- Open the editor, select the Tools menu and open CarFinalState. A window like this will be shown.
- At the top you can see many tabs. Click on the Audio events tab:
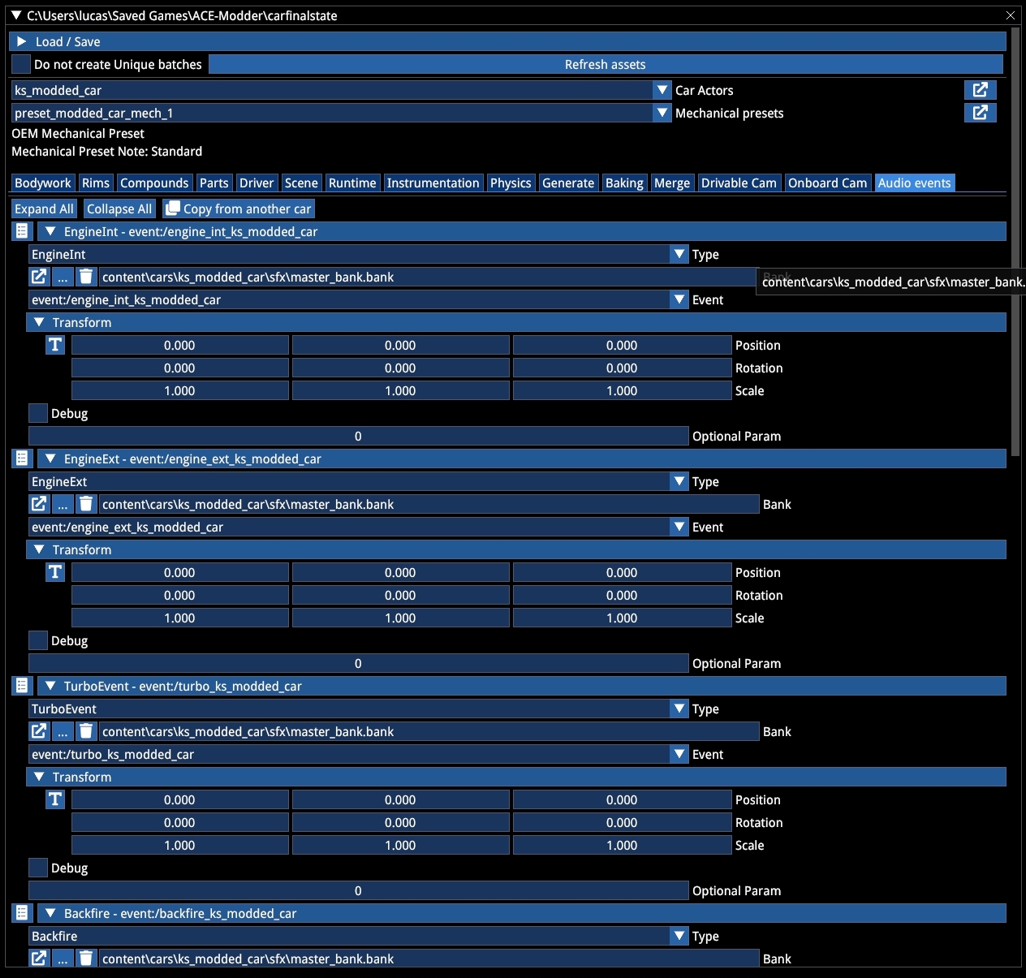
- For each audio event, perform the following:
- In the first dropdown menu, select the proper event type (e.g.
EngineInt). - Click the
...button, typemasterin the Filter field, and choosemaster_bank.bank. - In the last dropdown menu, choose the corresponding audio event (e.g.
engine_int_ks_modded_car).
- In the first dropdown menu, select the proper event type (e.g.
- Repeat for the other audio events.
- When you have completed the assignments, click Save reference actor at the bottom of the list.
Now you are ready to test your car audio in game!
References
- Kunos Simulazioni, AC EVO Audio Modding Pipeline official documentation