AC EVO – Driver Animation Pipeline
This document describes the complete production, export, and import workflow for driver animations in AC EVO.
1 Blender Scene
You can open the provided template scene with Blender 5.1 or higher. Inside you'll find 3 collections:
| Collection | Description |
|---|---|
Export_Rig | Hierarchy of bones defining the character position; only needed during the export phase |
Control_Rig | Basic set of controls to modify driver animations; includes a reference mesh for weight transfer and proportion adjustments for custom drivers |
Car_Interior | Car interior mesh to use as a reference for the driver base pose |
Important
- Do not change the bone names and hierarchy structure of
Export_Rig. - Control_Rig upgrades and edits are not recommended for inexperienced users.
- The game uses certain hardcoded bone names (such as
HEAD) to apply physics-driven G-force animations, so do not change the name of any of these bones.
2 Driver Animation List
Each car in ACEVO uses a specific set of driver animations that must match the different car cockpit volumes, steering wheel shapes, and shifter types. Each animation must have the following duration (in frames) and follow the logic described later in this document in order to work properly in game:
| Animation Name | Frames | Description |
|---|---|---|
Driver_position | 200 | Base driving pose |
Driver_steer | 200 | Steering wheel rotation |
Driver_accel | 20 | Throttle |
Driver_brake | 20 | Brake |
Driver_shift | 30 | Manual shift (first half) |
Driver_shift_change | 20 | Manual shift (second half) |
Driver_shiftpad_up | 20 | Shift paddle – upshift |
Driver_shiftpad_down | 20 | Shift paddle – downshift |
Driver_idle | 1000+ | Idle waiting animation (optional) |
Driver_handbrake | 30 | Handbrake (WIP, not fully implemented) |
Driver_clutch | 20 | Clutch (not supported) |
3 Animation Logic
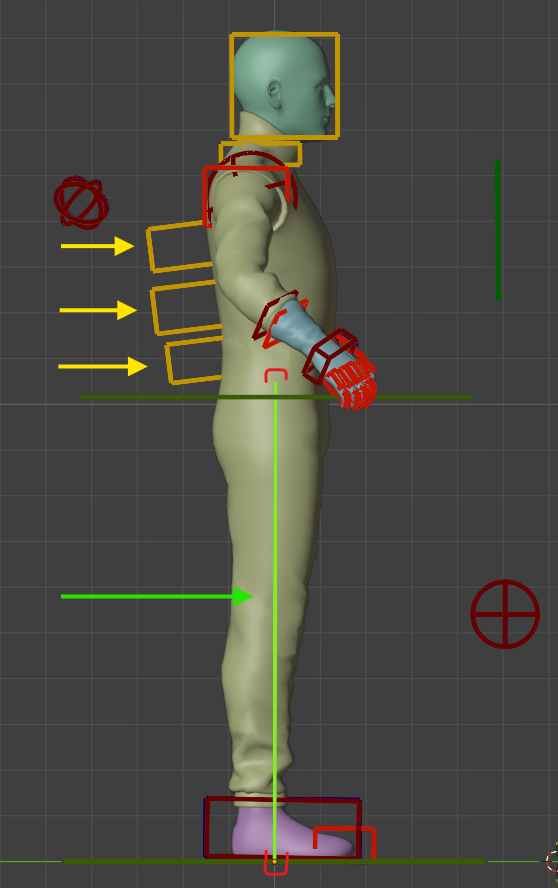
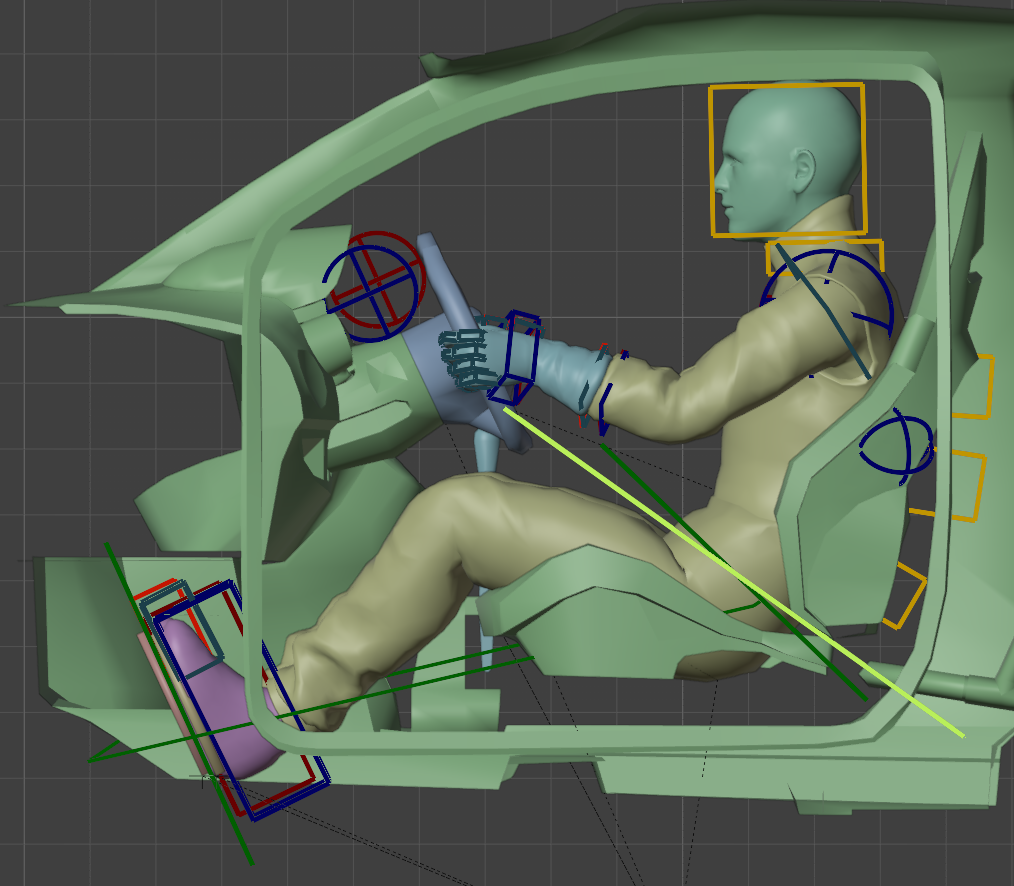
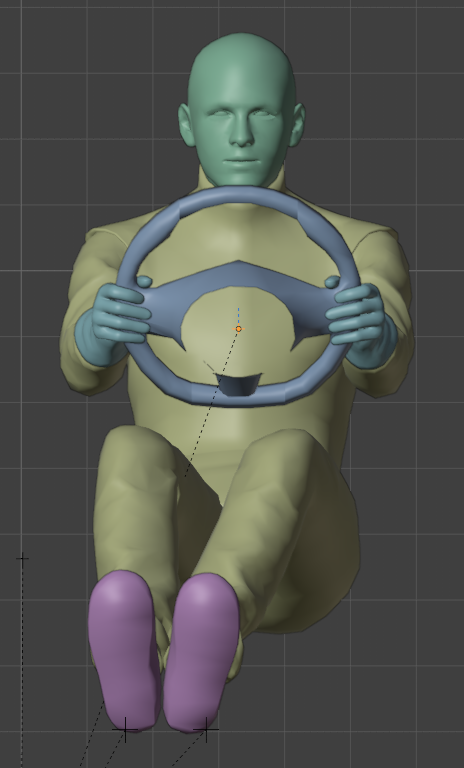
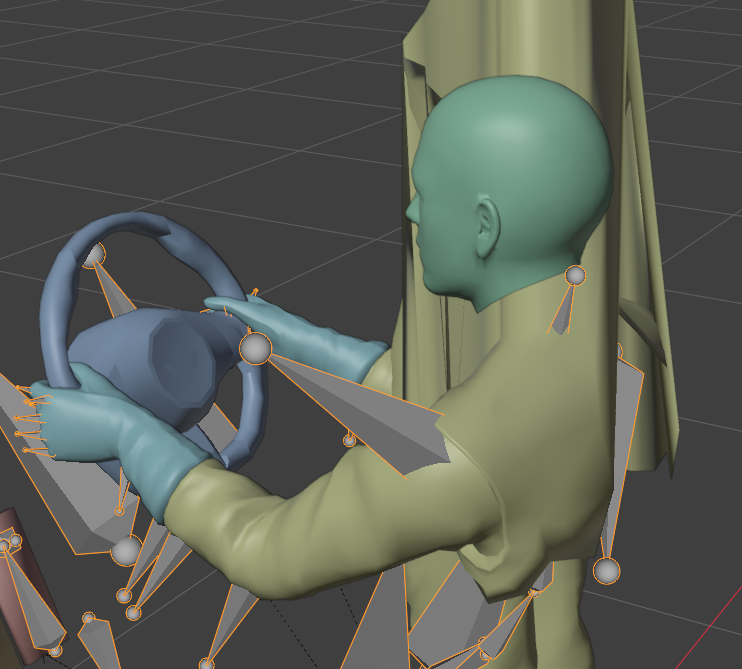
Driver_position
Base driving position — the driver is placed in the proper driving seat with hands on the wheel, feet on the pedals (accelerator and brake), and head looking straight through the windshield (or right above the wheel).
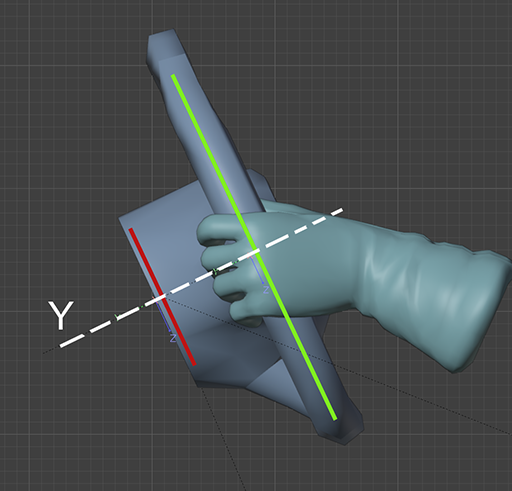
Some situations may require shrinking the driver's spine slightly — move the yellow handles on the driver's back along the Y axis, or scale down (with the dedicated green handle) the legs.

TIP
Sometimes it's necessary to let the driver's butt or back sink into the seat. The ranges aren't as elastic as real seats, so some adjustment is needed.
Driver_steer
Steering animation. The hands follow the linear rotation of the steer from -360° at frame 0 to +360° at frame 200.
- Frame 100 = 0° steering in the editor (centered)
- Frame 100 → Frame 0 = LEFT steering
- Frame 100 → Frame 200 = RIGHT steering
The animation at frames 0, 100, and 200 should match Driver_position.
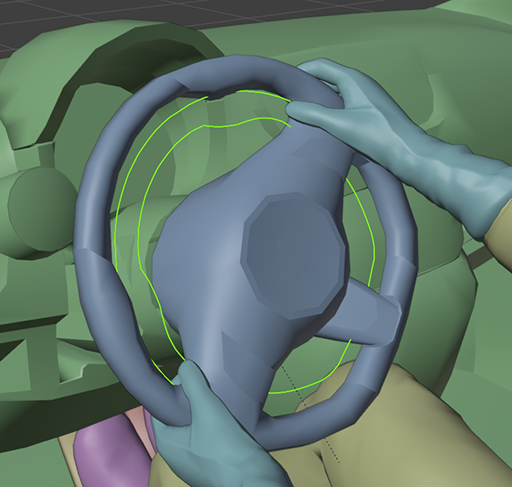
When the steering wheel has shifter paddles, fingers should be placed above the pads (not pressed) when in reach.
Driver_accel
Right foot pressing the accelerator pedal. Frame 0 is Driver_position, frame 20 is full throttle.
Driver_brake
Left foot pressing the brake pedal. Same logic as Driver_accel.
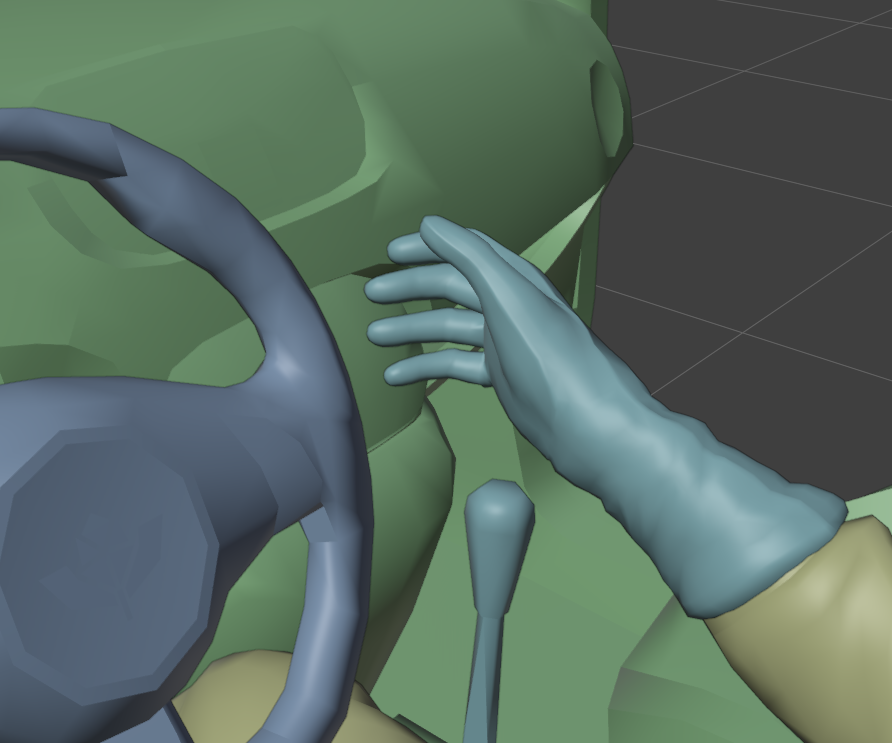
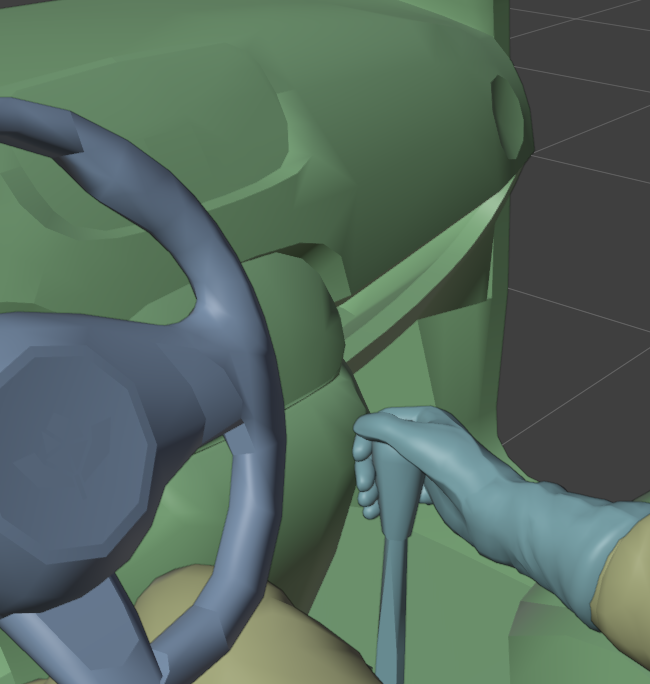
Driver_shift
First half of the manual shift animation. The open hand starts away from the steer at frame 0 and is placed on the shift handle at frame 30, ready to change gear.
Driver_shift_change
Still part of the manual shift. Starting from the Driver_shift final frame (matching frame 0), the hand moves forward following the gear stick at frame 10 and returns to the starting pose at frame 20.
WARNING
At this time, different gear positions are not supported. All forward gears and reverse use the same set of animations.
Driver_shiftpad_up
Shift paddle upshift animation. The last two digits of the fingers that are on the paddle press and release:
- Frame 0 =
Driver_position - Frame 5 = paddle pressed
- Frame 10 = back to
Driver_position - Frame 20 =
Driver_position(loop end)
Driver_shiftpad_down
Same logic as Driver_shiftpad_up.
Driver_idle
Optional idle animation played in pits before the session starts. No limits on frame length, but usually under 2000 frames. It's a loop animation, so it starts and ends with Driver_position.
Driver_handbrake (WIP)
Just like Driver_shift, the hand starts a bit away from the steering wheel and then reaches the handbrake. The handbrake lever is usually not animated, so the driver animation only fakes the pulling motion in the last 10 frames.
WARNING
The implementation of this animation is not yet fully working as intended.
Driver_clutch (Not Supported)
As with the other pedals, this animation can be exported and assigned, but it is not currently supported because of the impossibility of introducing anticipation. The recommended feet animation includes the feet resting on the accelerator and brake, with braking and accelerating via pushing motion without involving the clutch.
4 Scene Setup for Export
4.1 Import Car Interior
- Import the interior of your car.
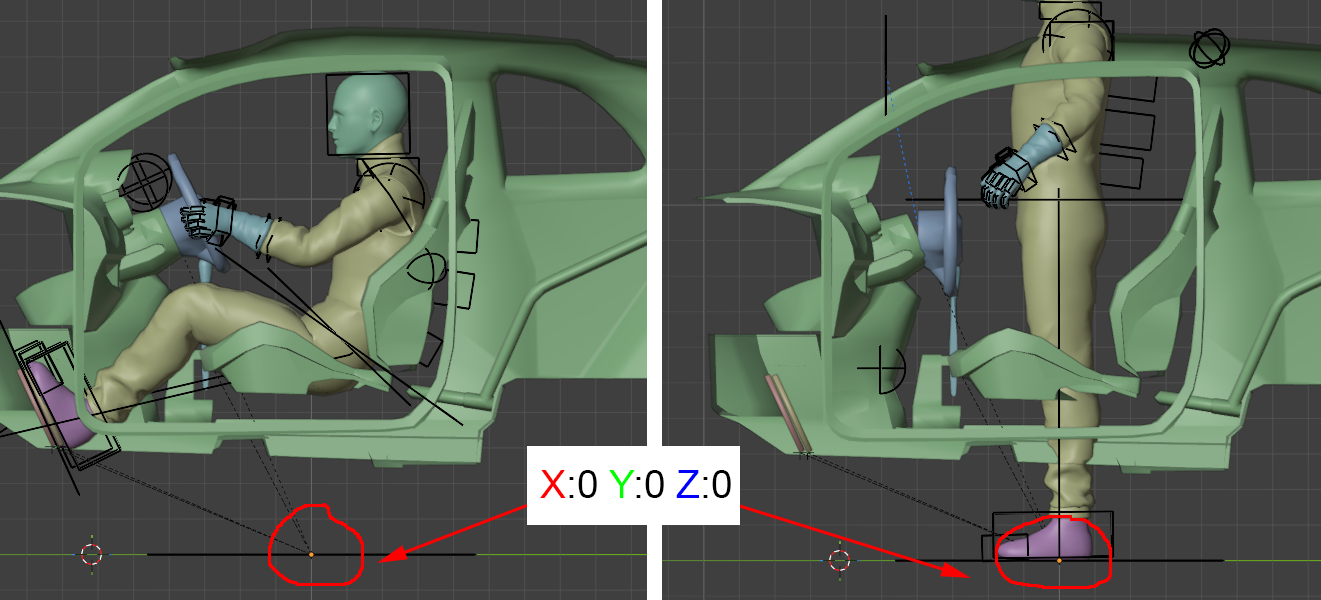
4.2 Position the Driver
- Move the driver seated correctly as shown.
Do not move the ROOT NODE of the hierarchy.
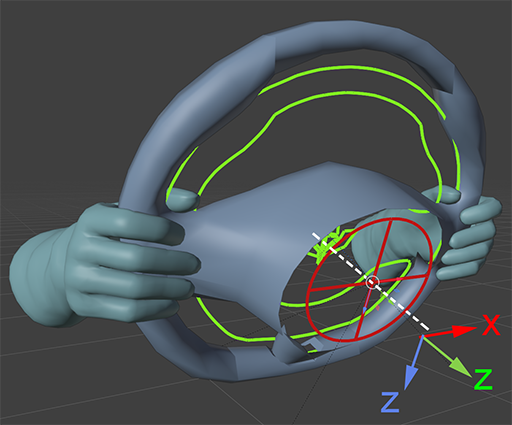
4.3 Steering Wheel Alignment
- Align the translation and rotation of the
A_Steercontroller with the dummy used to animate the steering wheel. - Adjust the
A_Steer_Rotcontroller position and scale to match the wheel rim.A_Steer_Rotis also the controller used in the steering animation.
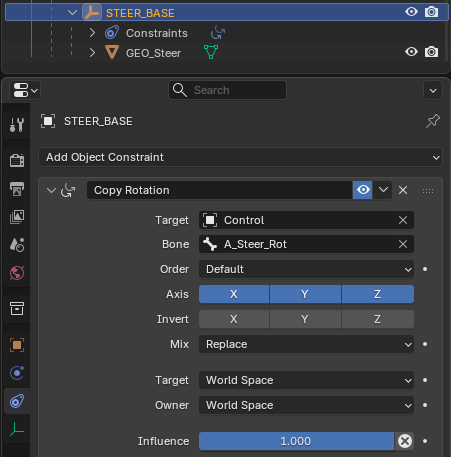
- Once the steer controllers are correctly aligned, you can apply a rotation constraint on the steering wheel dummy by forcing its rotation to match the
A_Steer_Rotbone.
TIP
To facilitate the export phase, it is recommended to divide each type of animation into different Actions that can later be saved in different tracks in the Blender NLA (Nonlinear Animation) editor.
5 Exporting Animations
5.1 Export Helper Script
In the Blender Scripting layout of the provided scene, you should find a simple script that can help you export your driver animations for the ACEVO editor. The Export_Helper script can also be copied and pasted from the included text file.
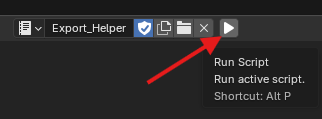
- Run the script — this activates the Export Helper panel in the bottom-right corner of the 3D viewport.
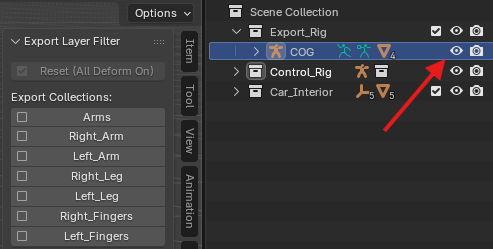
- Inside the Export Helper panel, you'll find options to temporarily isolate the bones you need to export. Check visibility and select the COG armature inside the
Export_Rigcollection.
5.2 Step-by-Step Export
For each animation, follow these steps:
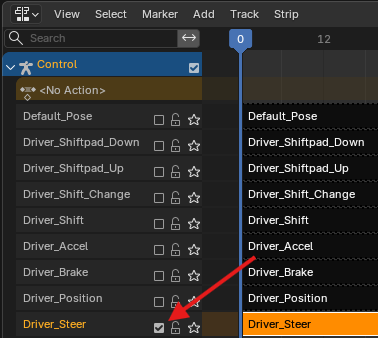
- Turn on the action you want to export in the NLA editor (other actions must be unchecked).
- Set the corresponding animation length in the timeline.
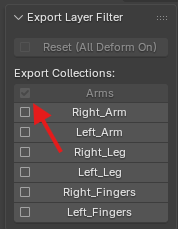
- Check the box that refers to the bones you animated in the Export Helper panel.
- Select the COG armature in Object Mode and export as
.fbx.
Export example: Driver_steer
- Turn on the
Driver_Steeraction in the NLA editor - Set timeline to 200 frames
- Select the Arms checkbox (includes both arm bones) in the Export Helper menu
- Select and export the armature as FBX
WARNING
The script will uncheck the Deform option of the bones that need to be excluded during export. This temporarily removes the corresponding weights from the driver mesh, producing a visual glitch. You can reset these settings when you've finished exporting using the Reset button in the Export Helper menu.
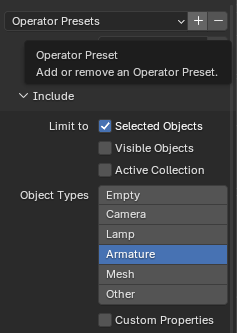
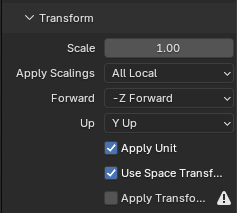
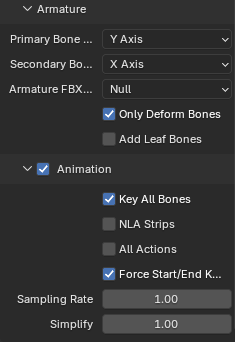
Use these settings to correctly export your animations with the .fbx format:

6 Editor Import
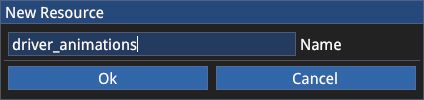
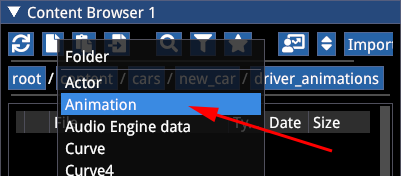
- Open the ACEVO editor and create a folder with a proper name for your driver animations.
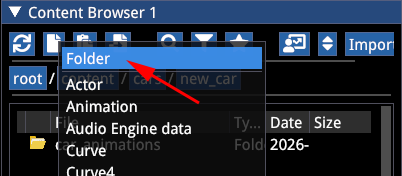
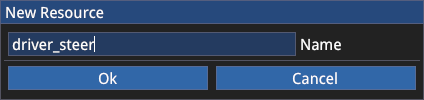
- Create an Animation type asset and import the driver animation. Navigate with the file browser to the animation folder you previously created.
- Double-click the animation asset to open its tab. Initially the window will appear empty.
- In the Preview tab, fill it with the provided
Driver_Dummy_full_TESTmesh — you should then see the dummy ready to be animated.
- Fill the path with the animation file you exported from Blender and press the Import button.
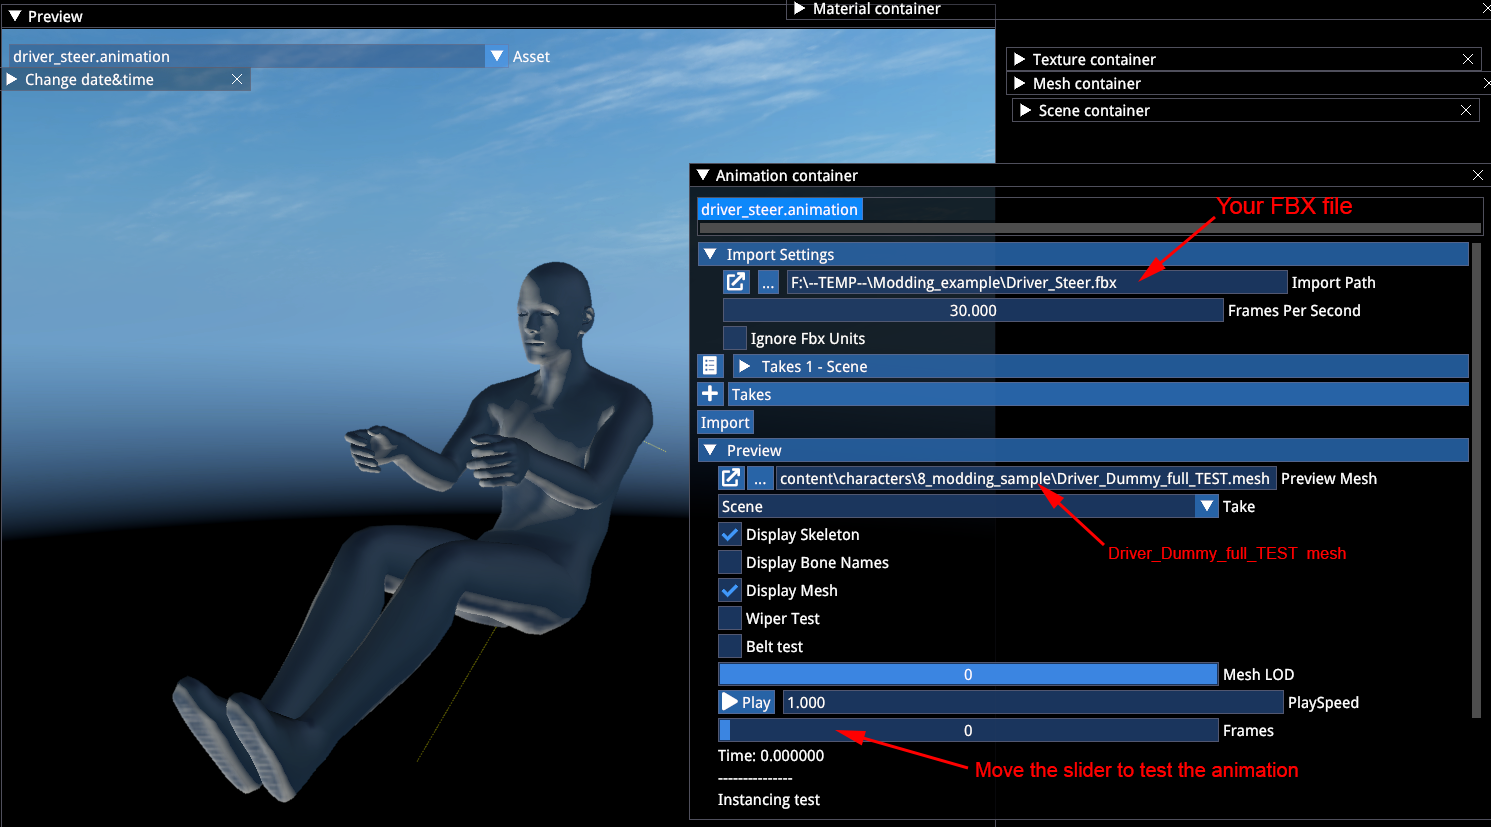
- You should be able to play the animation with the Play button or slide the frames on the timeline below.
TIP
It is recommended to import and open the preview of the Driver_Position animation first, so subsequent imported animations will display the driver in the correct position (instead of A-pose).
7 Assigning Animations
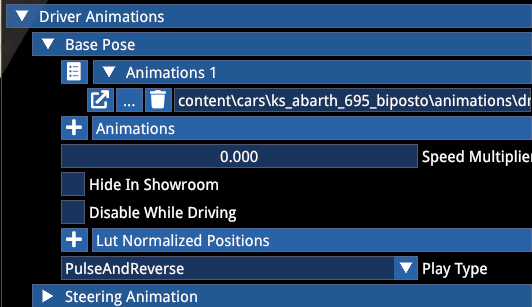
- In the car Actor you'll find the Driver Animation tab.
- From your animations folder, drag the animation into its correct slot:
| Slot | Corresponding Animation |
|---|---|
| Base Pose | Driver_Position |
| Steering Animation | Driver_Steer |
| Steering Paddles Gear Animation | Driver_ShiftPad_Up / Driver_ShiftPad_Down (only for cars with dual shifter setups) |
| Gear Shift Up / Down | Driver_Shift_Change |
| Manual Shift Approach | Driver_Shift |
If your car only has one steering configuration, use the Steering Animation slot.

7.1 Animation Blending Parameters
Under the Driver Animation tab you'll find the Animation Blendings section. These values determine the speed of animation playback and blending transitions:
- Shift blending speed: transition speed from steering to shifter animation (first value = hand transitioning to the shift stick, second value = reverse)
- Shift change & anticipation playtime: also divided into forward and back values
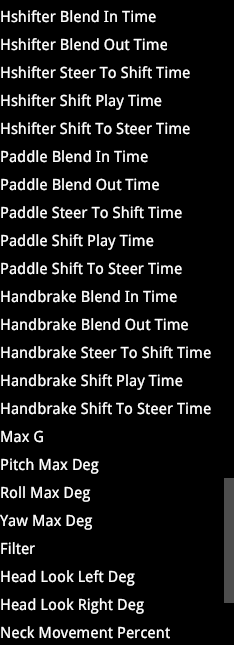
7.2 G-Force Parameters
The following are G-Force slider parameters controlling neck and head motion while driving:
- Max G: maximum G-force allowed (usually set to
1) - Filter: used to exclude minor variations in head G-force
- Pitch / Yaw: adjust considering helmet/head compenetration with the seat, especially with head side bolsters
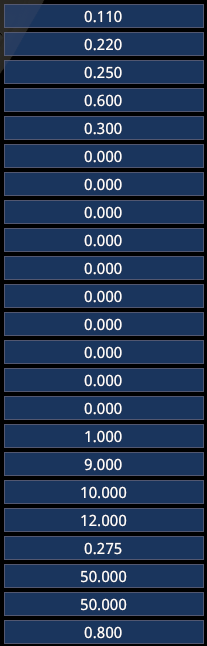
The look left and look right values are currently inactive.
8 Testing Animations
- Open "carfinalstate" in the top menu — a scene will appear in the ACE editor.
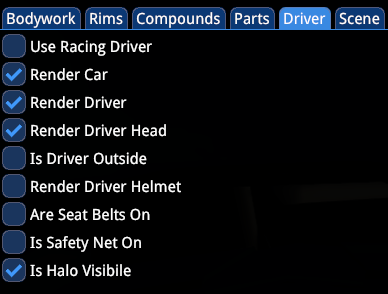
- Select your car Actor, open the Driver tab, and check the driver and helmet visibility.
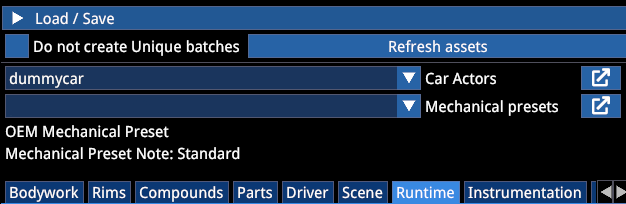
- Go to Runtime → Runtime Parameters → Driver Animations.
- Here you can test your driver animations as they will appear in-game.
TIP
It is recommended to test one animation at a time and leave the others at frame 0 to prevent overlap. In the same dropdown menu, you can also check the blending values (some values cannot currently be changed in real time). The displayed values are those currently saved in the car Actor.
References
- Kunos Simulazioni, AC EVO Driver Animation Pipeline official documentation