
2. Basic Guidelines
PROJECT AND FOLDER STRUCTURE
A vehicle project consists of a total of 5 models, including the high-poly model, 3 additional Level of Detail (LOD) models and a low-poly collider. The naming of the source files must be consistent with the make/type of the vehicle at hand. The recommended way to set up your project folder is the following:
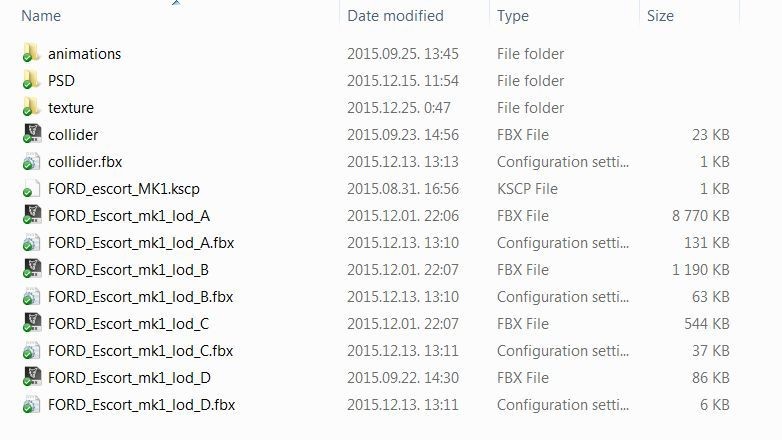
The .ini files are created by the AC Editor and include the object and shader properties for the models. The folder called texture is obligatory for the editor to load the texture files. The .kscp file is a project file created by the AC Editor.
BUDGET
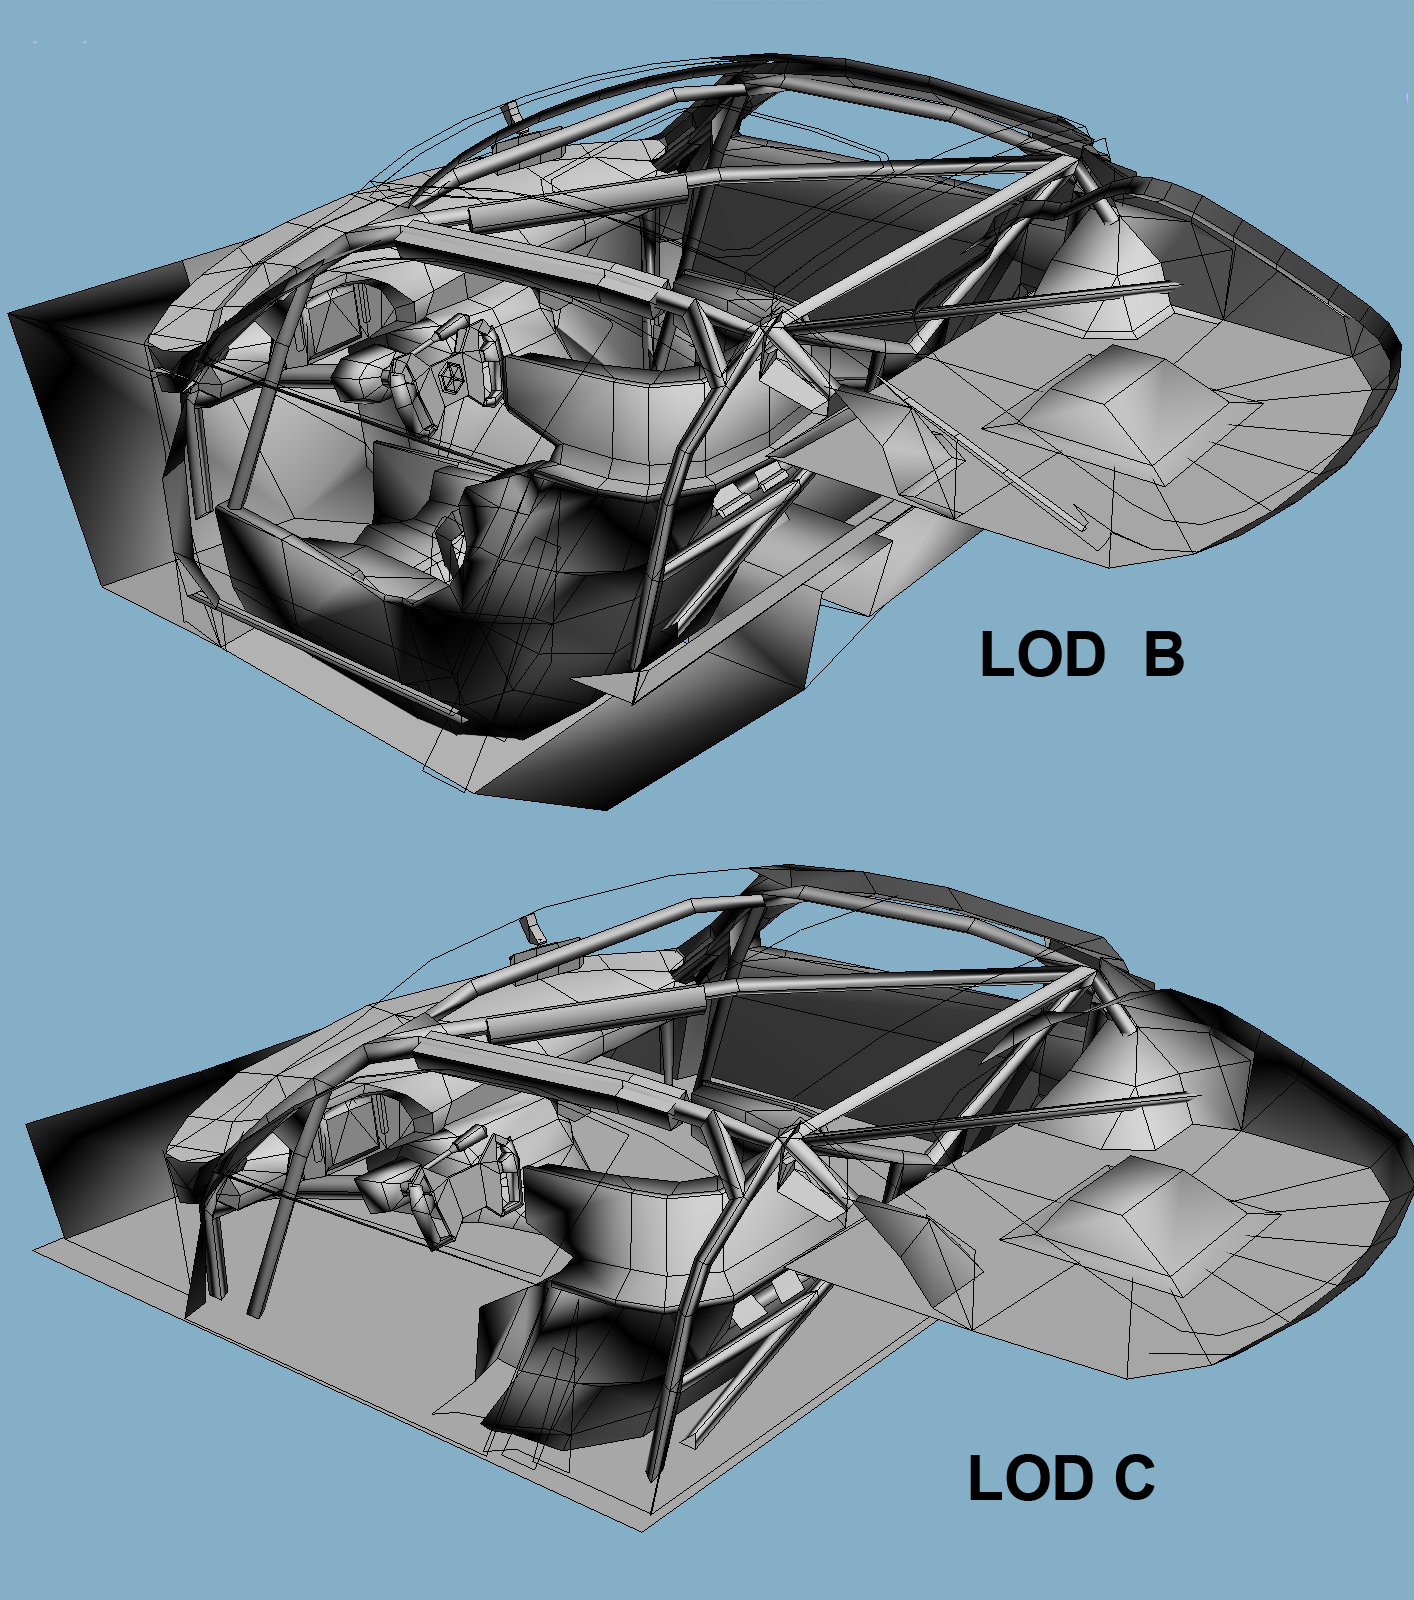
The following triangle-counts are recommended in most cases. Exterior: LOD A exterior: 125,000 triangles LOD B exterior: 20,000-25,000 triangles LOD C exterior: 10,000-12,000 triangles LOD D exterior: 2,000-3,000 triangles (as low as possible while you can keep the main shape) Interior: HR Cockpit: 125,000 triangles LR Cockpit: 7,000-10,000 triangles LR Cockpit in LOD B: 4,000 triangles (as low as possible while keeping a decent quality) LR Cockpit in LOD C: 2,000 triangles (some detail must remain above window level) Of course, these numbers are generic and apply to most tin-top cars with elaborate interiors. Open-wheelers with small cockpits can use fewer triangles for the interior and more for details on the exterior, such as the engine and suspension. It is up to the judgement of the modeller to use this budget in accordance with the complexity of the model, but it MUST be optimised as much as possible without hurting the overall quality. When producing the LODs, the most important guideline to follow is to reduce draw calls (number of objects) as well as the number of separate materials. For example, the LR interior should only use 1 material, but if there are customizable parts (such as different interior colour options, it must be possible to use the detail texture defining the colour on the LR interior model, too. By LOD C, the number of materials and objects should drastically drop, while for LOD D no more than a maximum of 2 materials and a similar number of objects (no rotating wheels are required) should be used. Here are some examples for the progressive degradation of the mesh in the LOD steps:
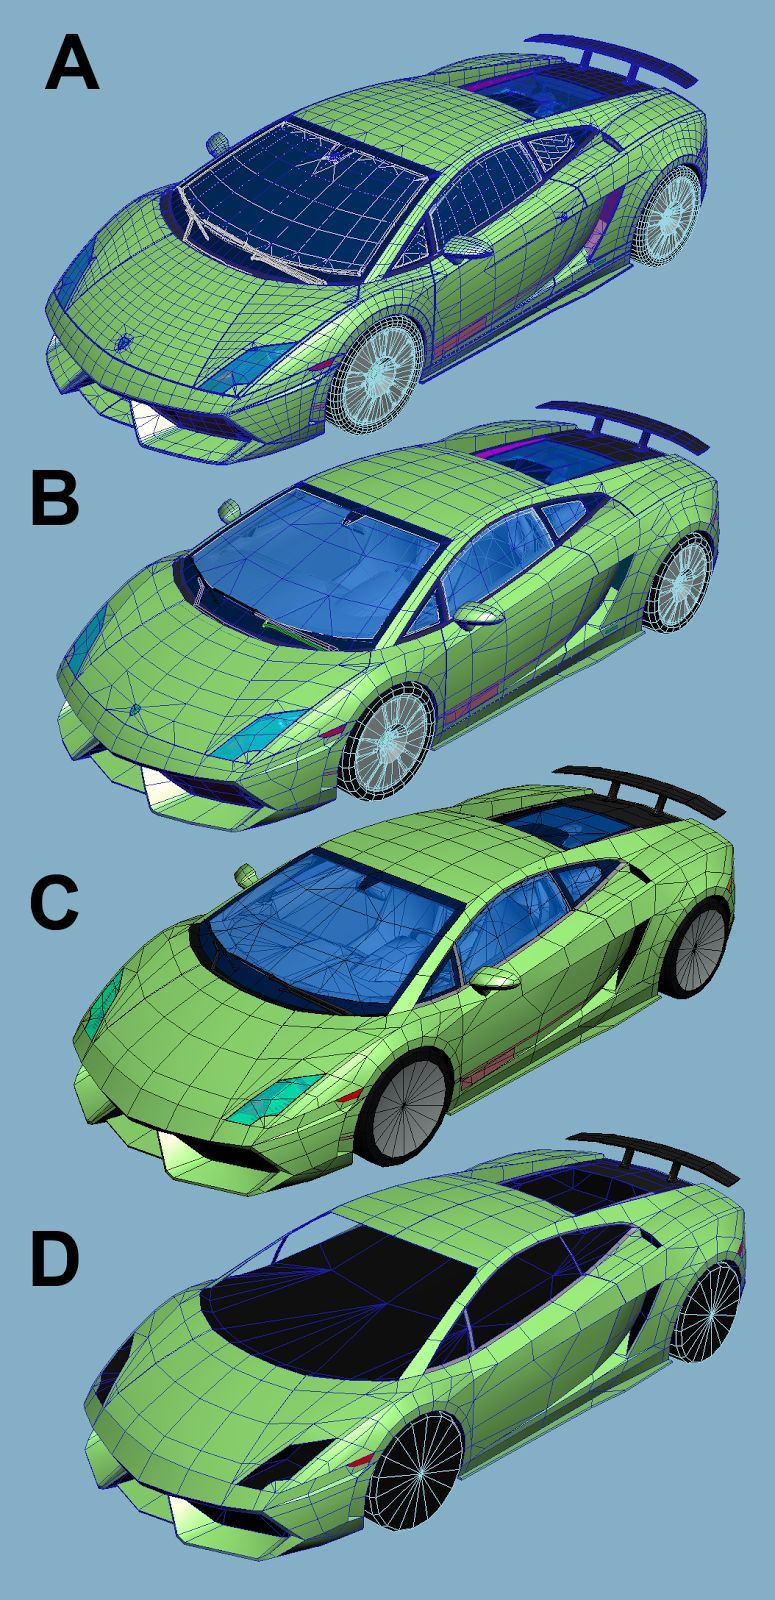
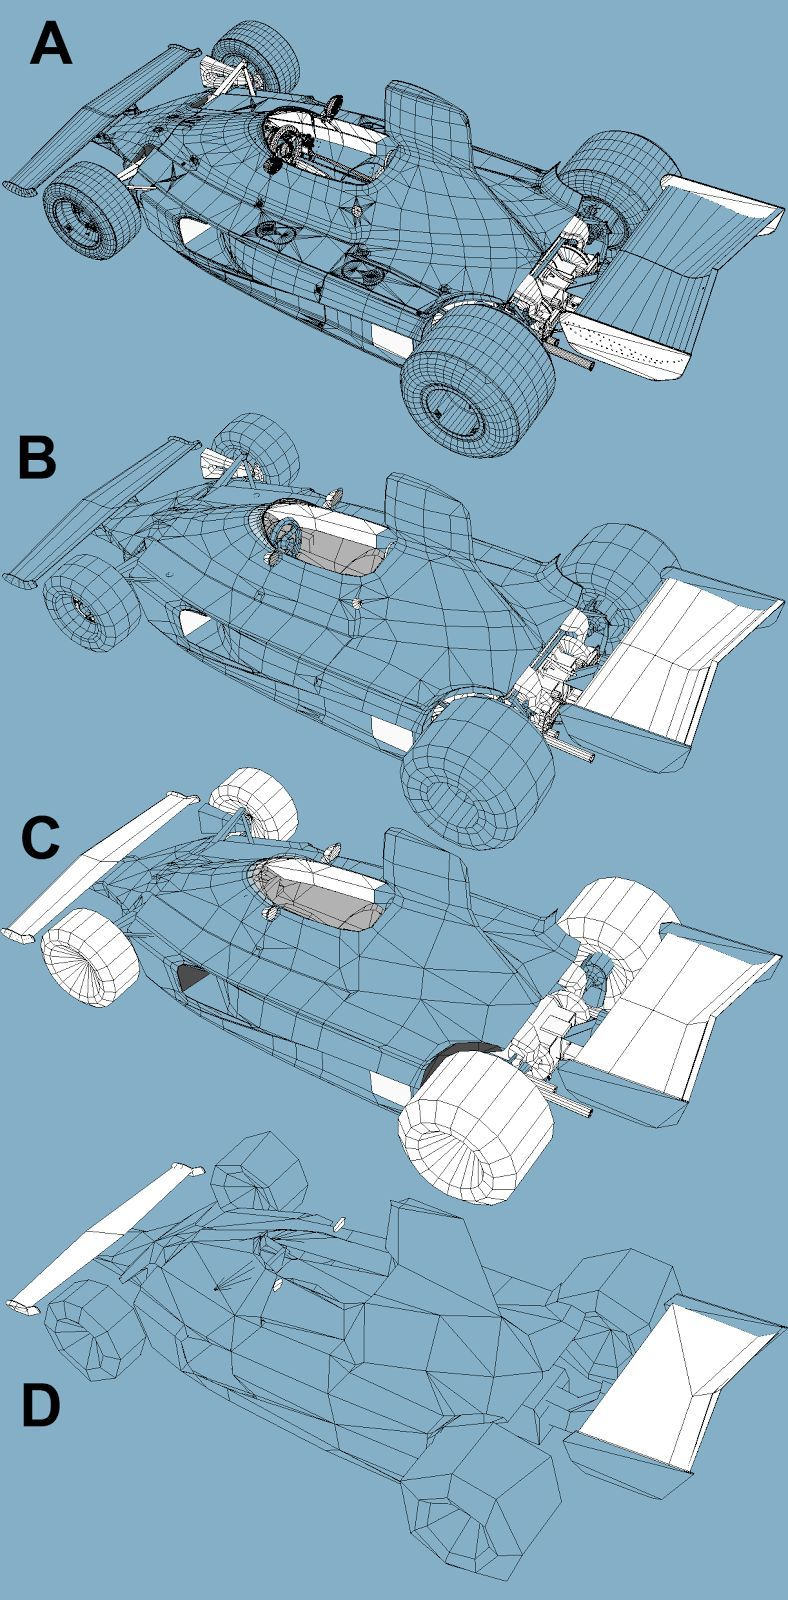
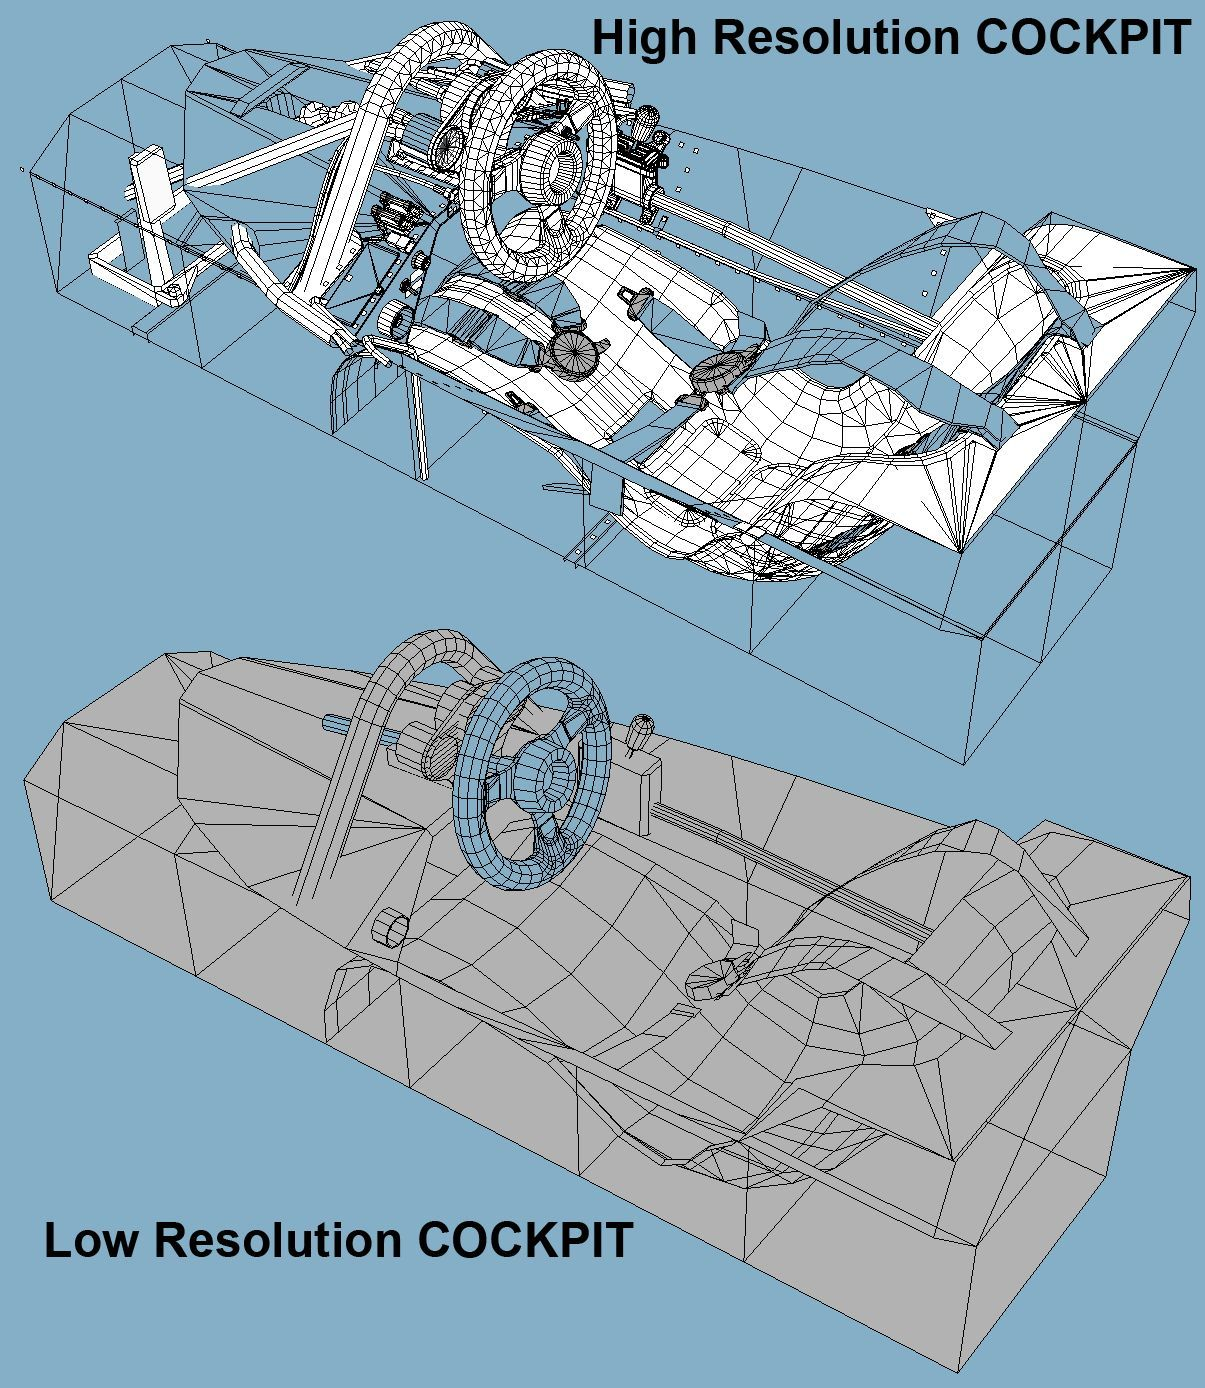
The same guidelines apply for the interior:
VERY IMPORTANT:
NOTE: Keep in mind that the LOD B will be visible at a distance of 15 meters or closer. If you create a well-made LOD B, you can reduce the distance of the LOD A switch to LOD B and increase game performance. To achieve this, try to reduce the model keeping the curved parts smooth, parts that create evident reflections, such as glass or curved parts of the body. Try to see how it works in the game and refine it. The switch between the LODs must be as smooth as possible without any visible “jump”. On the LR Cockpit you must keep the most visible parts relatively detailed to ensure that the switch is smooth. In tin-top cars this includes the top of the dashboard and the frame around the side windows and the rear window. In open-seaters the sensitive parts are usually the area around the steering wheel and behind the driver. NOTE: The LOD B and LOD C MUST have a separate LR Cockpit mesh that matches the reduced topology of each LOD exterior mesh. The interior mesh must fit the exterior mesh and the outlining vertices must be snapped. Do NOT use the same LR Cockpit mesh for LOD A, LOD B and LOD C. Make sure there are no gaps between the interior and exterior mesh. LOD A COCKPIT_HR 125,000 tris LOD A COCKPIT_LR 7,000 tris Cockpit HR LOD example Cockpit LR LOD example
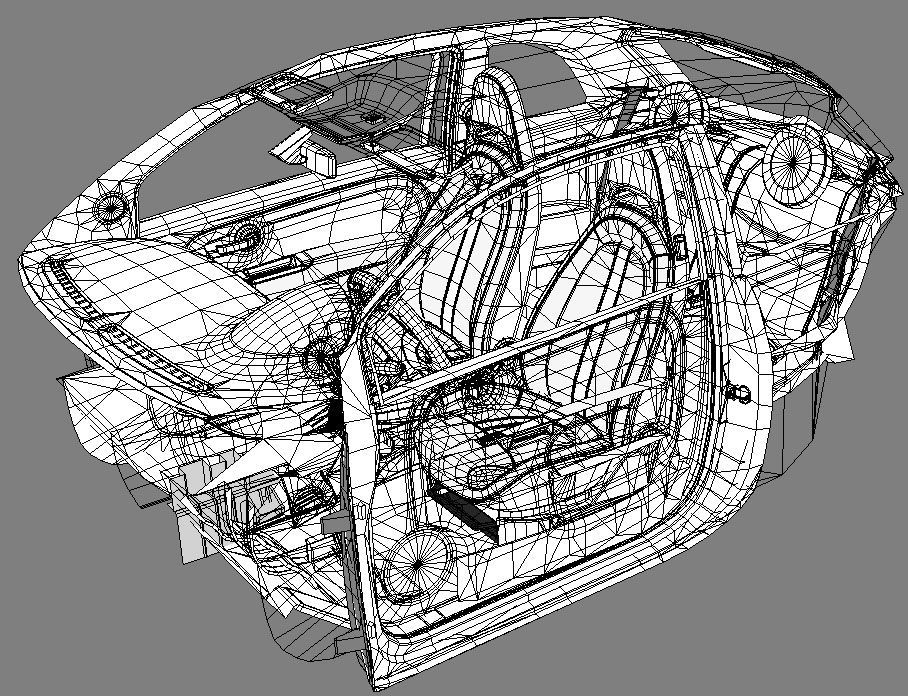
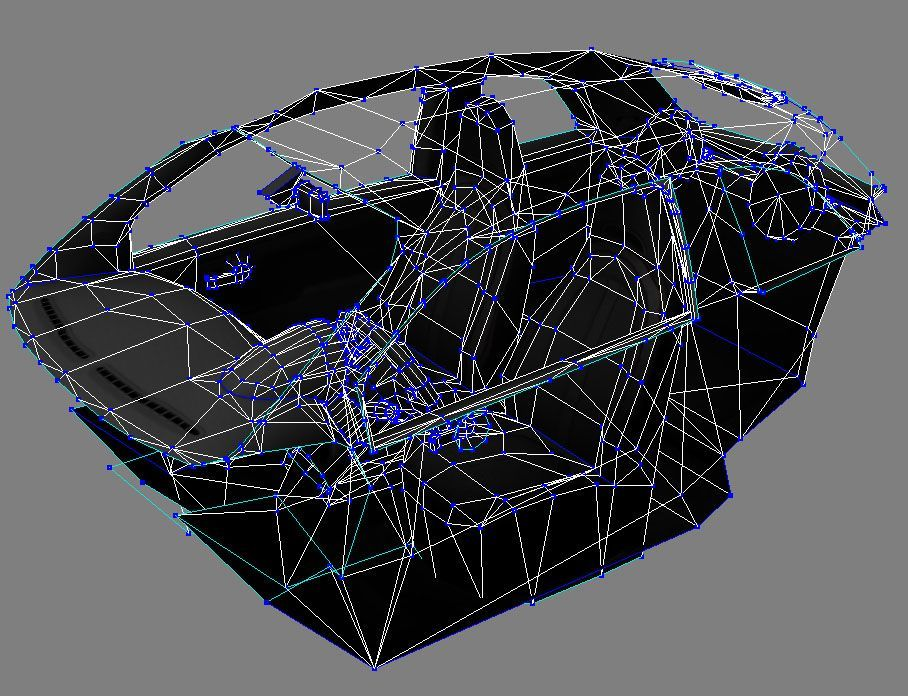
In LOD A, the cockpit (see the image above) has 2 LODs, one High Resolution (HR) for the cockpit camera and showroom view, and another Low Resolution (LR) LOD for most exterior cameras, replays, and distant views. NOTE: The HR and LR
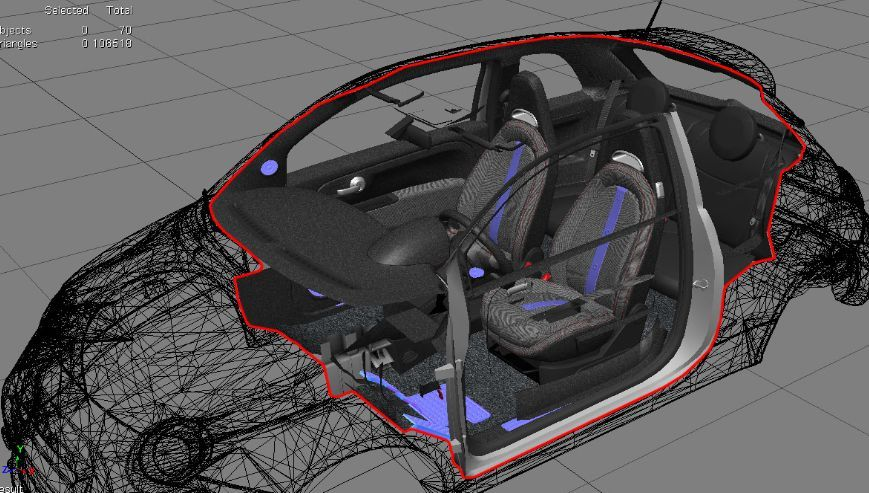
cockpit LODs must always fit the exterior LOD A, because while driving, the EXTERIOR MESH that is present is the LOD A. When the camera moves farther away, the cockpit LR will switch and you get a simplified version of the cockpit, with only one material (in most cases) and a look very similar to the HR version. In some cases when the car has a customisable interior with multiple colour options, more than 1 material is allowed on the LR interior but as a general rule, try to keep it as low as possible.
SCRIPT TO MANAGE LODs
LODs are a set of simplified models that change in relation of the camera distance. This process is necessary in order to optimize the framerate in the game. The LOD switch can be controlled via script, named lods.ini, located in AssettoCorsa/content/cars/CAR-NAME/data. The script contains the following values:
[COCKPIT_HR]
DISTANCE_SWITCH=6 ;Indicates the distance (in meters) when the
cockpit HR change to the cockpit LR (if present)
[LOD_0]
FILE=abarth500.kn5
IN=0
OUT=15 ;Indicates the distance (in meters) when lod_A changes with
lod_B (if present)
[LOD_1]
FILE=abarth500_B.kn5
IN=15
OUT=45 ;Indicates the distance (in meters) when lod_B changes with
lod_C (if present)
[LOD_2]
FILE=abarth500_C.kn5
IN=45
OUT=200 ;Indicates the distance (in meters) when lod_C changes with
lod_D (if present)
[LOD_3]
FILE=abarth500_D.kn5
IN=200
OUT=1500 ;Indicates the distance (in meters) when lod_D disappears
from visual.
NOTE: Verify that the distance of LOD “out” value matches the “in” value of the next LOD, otherwise your car will disappear before the switch. ADDITIONAL INFO: The LOD B must have the same null hierarchy as the LOD A except for the nulls COCKPIT_HR, STEER_HR and the FLYCAMS, which should not be present. Based on how visible the elements are, it is up to your judgement to remove other non-essential nulls, such as wings, bumpers, the hood etc. in LOD C.